I made it out to a LEGO store this weekend and got the parts I needed for this guy:
Special thanks to the staff at the Orland Park LEGO store for helping me find the pieces that I need.
This is the logo for the place where I work. This was done using a 48x48 baseplate covered in black 4x8 plates. I then use an image reduced to 48x48 pixels. For each point on the image I guestimate a lightness value between 1 and 5 with 5 being full white. I then layer clear pieces until I get the color I'm looking for. It ends up being a big paint-by-number.
This is a technique I saw a few times at Brickworld earlier this year. I thought it was interesting and I wanted to try it. I think it turned out pretty well.
Sorry no instructions for this one. I think they would be pretty difficult to read anyway.
Tuesday, September 23, 2014
Monday, September 1, 2014
Sweeping up the Streets
My latest build is a little street sweeper to clean up the streets:
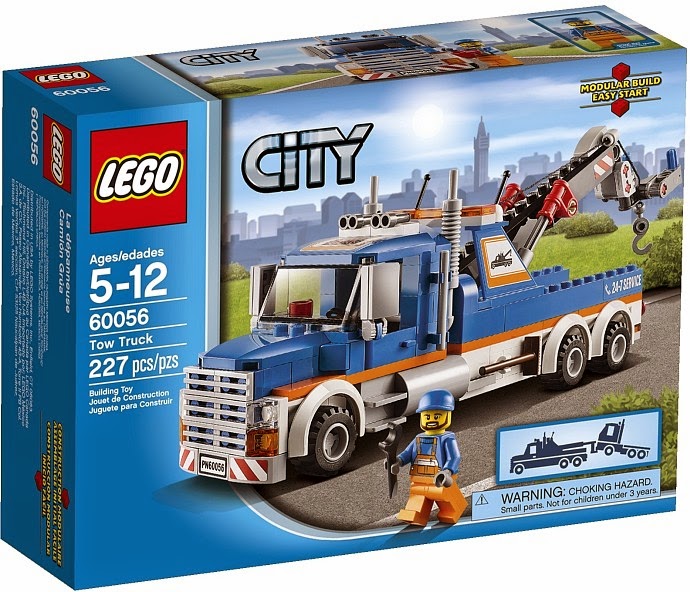
This is an alternate build of the Tow Truck (60056):
This was a fun little project. I knew I wanted to change the front of the truck to a flat-nose style cab. The front grill had several revisions. The bumper and the grill were sticking out too much which was taking away from that flat-nose look. I like what I have pretty well, but I think some other official LEGO sets do a better job.
I wanted to use the extra wheels for something. Using them as street cleaner scrubbers seemed like a pretty good fit. I was worried the scrubbers would be flimsy. It turns out that the spacers I needed to place them properly and the extra pieces I used to fill out the area made for a very solid build.
The tanks in the back required a bit of fiddling as I was running out of pieces. In the end, I got all of my gaps sealed up. I really like the way the broom sits on the back. The antenna on the back of the cab is there to make up for not having a full 1x4 brick to fill in that space. Whatever works I guess.
In the end, it is a very solid, fun little build.
Full build instructions can be found HERE.
Monday, April 28, 2014
Ice Beam vs Mech
So here we have the Ice Beam vs Mech:
This was an interesting build. The clear blue studs led me to play with a leaky fire hydrant. The large round corners reminded me of shoulders on some bulky cartoon mechs.
As I played with the idea of a rampaging mech, I started to look at the big clear pieces I had. I thought an ice beam spraying a wall of ice to stop the mech might be cool (see what I did there).
Nothing too complicated, but fun all the same.
As usual, instructions can be found HERE.
Friday, April 18, 2014
Chateau de Helm's Deep
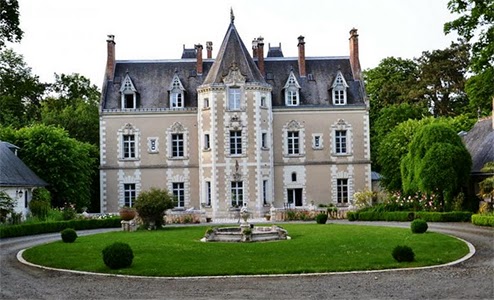
It's finally time to reveal the alt-build for The Battle of Helm's Deep (9474). I present the Chateau de Helm's Deep:
This has been my largest build to date. I started with putting together all of those windows to see what it would look like. After playing with it for a bit, I thought, "That looks like a Chateau."
After doing a Google search, I was pleased to find that a Chateau was really what I was looking for and not some word I made up.
While the back doesn't look like much, it has a lot of play features.
The rooftops come off, the back walls and staircase swing open and the center piece in the back pops out.
The second floor also separates from the first floor.
Let me take you on a tour of some of our fabulous features.
As you enter, you will notice the wonderful tile flooring throughout the foyer.
Our dining area is cozy and we serve an excellent chicken leg.
We have a great sitting room with a lovely couch and loveseat and a fine lamp.
Next you will find our beautiful spiral staircase leading to the upper floor.
We have an impressive armory with authentic Middle-Earth era weapons and armors.
Finally, you will find that are sleeping quarters are welcoming after a long day (even if the beds do run a little on the "firm" side.)
Overall, I really like the end result. I still feel the back looks a little junky and it all doesn't close quite as nice as I would like. Despite that, I feel that this is a lot more complete than I expected it would be. It took a lot of work, but I like each of the little rooms and the spiral staircase. I hope you like it too.
As always, full instructions can be found HERE.
This has been my largest build to date. I started with putting together all of those windows to see what it would look like. After playing with it for a bit, I thought, "That looks like a Chateau."
After doing a Google search, I was pleased to find that a Chateau was really what I was looking for and not some word I made up.
While the back doesn't look like much, it has a lot of play features.
The rooftops come off, the back walls and staircase swing open and the center piece in the back pops out.
The second floor also separates from the first floor.
Let me take you on a tour of some of our fabulous features.
As you enter, you will notice the wonderful tile flooring throughout the foyer.
Our dining area is cozy and we serve an excellent chicken leg.
Next you will find our beautiful spiral staircase leading to the upper floor.
We have an impressive armory with authentic Middle-Earth era weapons and armors.
Finally, you will find that are sleeping quarters are welcoming after a long day (even if the beds do run a little on the "firm" side.)
Overall, I really like the end result. I still feel the back looks a little junky and it all doesn't close quite as nice as I would like. Despite that, I feel that this is a lot more complete than I expected it would be. It took a lot of work, but I like each of the little rooms and the spiral staircase. I hope you like it too.
As always, full instructions can be found HERE.
Tuesday, April 1, 2014
Mini-Micro Scale
I've been doing this blog for a little while now, but it is starting to feel so been-there, done-that.
So I've decided to take the blog in a new direction that will help me keep things fresh and hopefully help me to post more often.
A lot of people work on LEGO models. Some of them work on a micro scale. I'm going to dedicate this blog to the Mini-Micro Scale. This scale is so small that the models are built using only one brick.
To start, let's look at the historical Russian landmark, the Kremlin.
A magnificent red building that has been a great symbol of Moscow.
For this build I really wanted to get a feel for those wonderful rounded towers. I think this really captures the feel of the building.
Next I'm going to bring it back stateside and look to our own iconic government building, the White House.
The building many presidents have given speeches in front of and a great piece of American history.
With this model, I feel like I got to the fundamentals of what makes this a great building.
As we move on, I wanted to get something from one of the western states. So let's move on to Seattle's Space Needle.
This is a tall structure that makes me feel like the aliens have landed.
This model didn't go as well as I thought it would. I was really hoping for that strong Seattle feel, but I just couldn't make it happen.
Finally we move to India for the great Taj-Mahal.
This amazing structure was also the subject of one of the largest sets LEGO ever sold.
It really does look amazing at 5922 pieces! Let's see how it looks at 1 piece!
I never realized until now how much the Taj-Mahal looks like the Kremlin. Who knew.
As usual, you can find all of the building instructions and model files HERE.
So I've decided to take the blog in a new direction that will help me keep things fresh and hopefully help me to post more often.
A lot of people work on LEGO models. Some of them work on a micro scale. I'm going to dedicate this blog to the Mini-Micro Scale. This scale is so small that the models are built using only one brick.
To start, let's look at the historical Russian landmark, the Kremlin.
A magnificent red building that has been a great symbol of Moscow.
For this build I really wanted to get a feel for those wonderful rounded towers. I think this really captures the feel of the building.
Next I'm going to bring it back stateside and look to our own iconic government building, the White House.
The building many presidents have given speeches in front of and a great piece of American history.
With this model, I feel like I got to the fundamentals of what makes this a great building.
As we move on, I wanted to get something from one of the western states. So let's move on to Seattle's Space Needle.
This is a tall structure that makes me feel like the aliens have landed.
This model didn't go as well as I thought it would. I was really hoping for that strong Seattle feel, but I just couldn't make it happen.
Finally we move to India for the great Taj-Mahal.
This amazing structure was also the subject of one of the largest sets LEGO ever sold.
It really does look amazing at 5922 pieces! Let's see how it looks at 1 piece!
I never realized until now how much the Taj-Mahal looks like the Kremlin. Who knew.
As usual, you can find all of the building instructions and model files HERE.
Sunday, March 23, 2014
Helm's Deep
It's time to begin a new build. This time I will be working with The Battle of Helm's Deep (9474):
This is an amazing set and easily my favorite of the Lord of the Rings/Hobbit sets.
First off, they do an amazing job with the brick work. The large walls are broken up with the occasional masonry brick piece and spots of green.
The edges of the towers use alternate corner pieces to break up the otherwise smooth edges.
The arrow slits are made from a profile view of these side supports.
I also love the main door. Instead of some molded special piece we get an excellent LEGO-built door. Really nice.
I've put off working on this build for quite some time. I like the model so much that I really didn't want to take it apart. I highly recommend picking up the set if you can manage to find one. It has been great, but it's time for a change.
The challenge with this set will be to not make another castle. I will need to find something to do with all of these gray pieces. I'll probably just start smashing everything together and see what comes of it.
We will see what I come up with next time.
This is an amazing set and easily my favorite of the Lord of the Rings/Hobbit sets.
First off, they do an amazing job with the brick work. The large walls are broken up with the occasional masonry brick piece and spots of green.
The edges of the towers use alternate corner pieces to break up the otherwise smooth edges.
The arrow slits are made from a profile view of these side supports.
I also love the main door. Instead of some molded special piece we get an excellent LEGO-built door. Really nice.
I've put off working on this build for quite some time. I like the model so much that I really didn't want to take it apart. I highly recommend picking up the set if you can manage to find one. It has been great, but it's time for a change.
The challenge with this set will be to not make another castle. I will need to find something to do with all of these gray pieces. I'll probably just start smashing everything together and see what comes of it.
We will see what I come up with next time.
Monday, February 17, 2014
Winging It
It has been a while, but my new build is finally ready. This is another alt-build of the Millennium Falcon (7965).
I do have other sets that I will be using for builds. This guy just needed to be built.
I knew I needed to build something with those wings. They were taunting me, telling me to use them.
I wanted to try to make an angel, but I wasn't sure I would be able to. I tried making a few faces. If the head didn't work, he wasn't going to work at all.
I could only stand having these guys look at me for a little while before I knew I needed to build a body. The smaller head seemed like it could be a good scale, so away I went.
This build went through a ton of revisions. Initially he was on one knee, but that proved to be too unstable. His body went through several rounds of strengthening to make sure he didn't fall over into a pile. For a while I had his wings high on his back and down.
This hides much of his body and makes him more top-heavy. His arms can support a little weight if positioned properly, but overall he is quite fragile. He's fine if he is left alone, but a little bump and he ends up as a pile of parts.
In the end, I really like how he turned out. It has easily been my most complicated build. It should be a neat showpiece to sit on my desk.
You can find full build instructions HERE.
I do have other sets that I will be using for builds. This guy just needed to be built.
I knew I needed to build something with those wings. They were taunting me, telling me to use them.
I wanted to try to make an angel, but I wasn't sure I would be able to. I tried making a few faces. If the head didn't work, he wasn't going to work at all.
I could only stand having these guys look at me for a little while before I knew I needed to build a body. The smaller head seemed like it could be a good scale, so away I went.
This build went through a ton of revisions. Initially he was on one knee, but that proved to be too unstable. His body went through several rounds of strengthening to make sure he didn't fall over into a pile. For a while I had his wings high on his back and down.
This hides much of his body and makes him more top-heavy. His arms can support a little weight if positioned properly, but overall he is quite fragile. He's fine if he is left alone, but a little bump and he ends up as a pile of parts.
In the end, I really like how he turned out. It has easily been my most complicated build. It should be a neat showpiece to sit on my desk.
You can find full build instructions HERE.
Subscribe to:
Posts (Atom)